Restaurant setup from scratch
If you already have a setup using LS One and want to add a restaurant or use the hospitality functionality but do not want to start with the hospitality data package then you will need to create all the button menus specific for the hospitality setup, hospitality types and printing settings.
Hospitality configuration checklist:
You need to have a working Store/POS configuration before you begin the restaurant configurations. If you do not have that yet follow the Store setup checklist.
-
First you need to create a sales type such as dine in or take away. Each sales type can have different tax and price group setting.
-
Create your hospitality types. You need one hospitality type per area in your restaurant or different sales types, such as dine in or take away.
-
In the hospitality general tab:
-
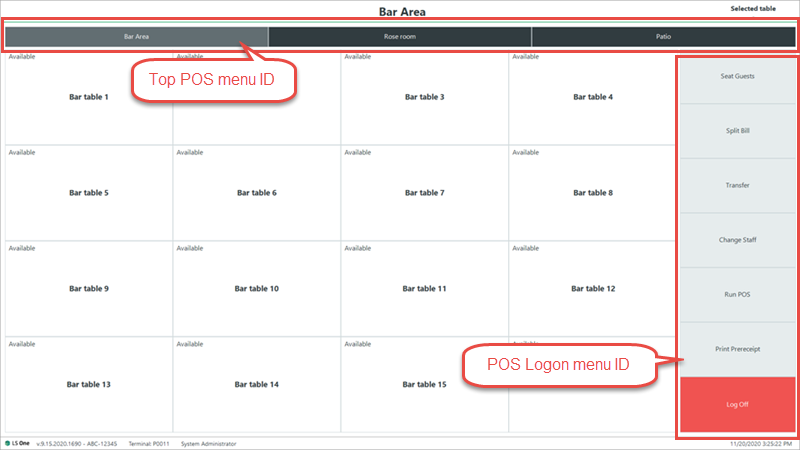
Top POS menu ID: In your hospitality profile you need to select a button setup that will be used for the hospitality type selection button. This button menu needs to include one button with no operations. This will control what the hospitality selection button will look like in the top of your table management screen.
-
POS Logon menu ID: You also need to create a button menu to display on the right of the tables in the table management screen. This menu must include operations such as the Log off operation. Read more about the hospitality button menu setup here.
-
Review other settings on this tab and select to your needs but the default settings can be used to get up and running.

-
- In the hospitality type Table button tab:
- Dining table layout ID: Create a layout for your tables for this hospitality type.
- Review other settings on this tab and set to your needs. Default settings can be used to get you up and running.
- Dining table layout ID: Create a layout for your tables for this hospitality type.
- In the hospitality type Split bill/Transfer lines tab:
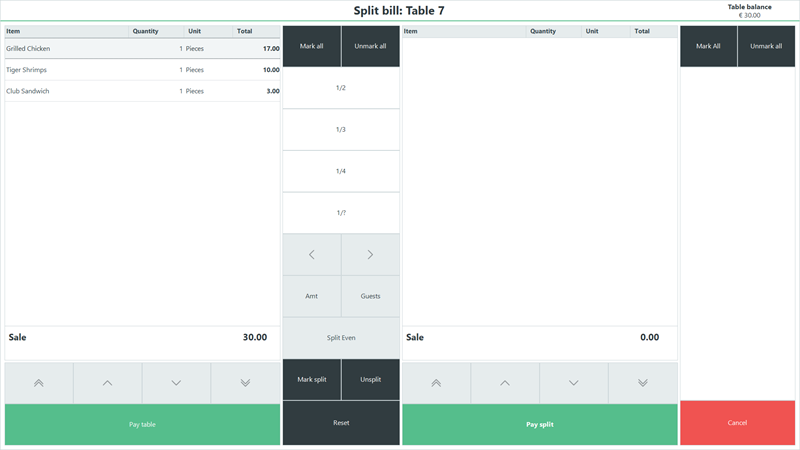
- Split bill POS menu group: You need to create button menus and group together for the split bill screen

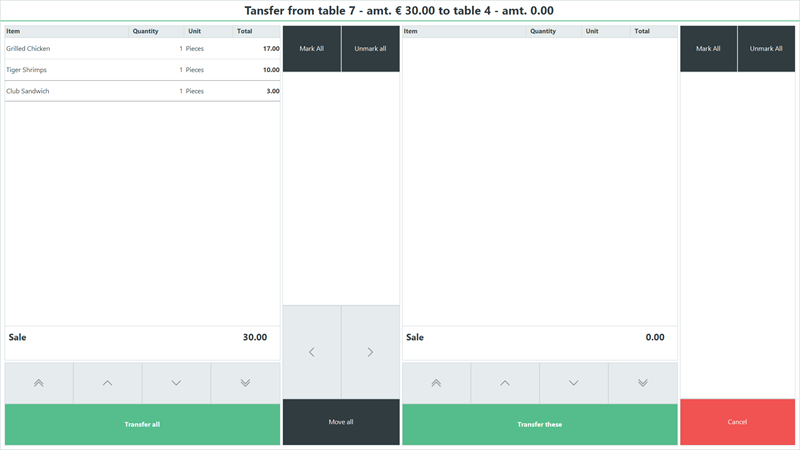
- Transfer lines POS menu group: Create a button menus and group them together for the transfer table screen.

- Split bill POS menu group: You need to create button menus and group together for the split bill screen
-
Now you need to select your hospitality types for your terminals
-
Go to Sites > [Stores/Terminals] Terminals > Edit your terminal > Hospitality tab. Mark the hospitality types that should be visible for this terminal.
-
-
Edit the functionality profile that is in use for your store. If there is a functionality profile selected for the terminal that is the functionality profile the terminal uses.
-
Go to Sites > [Profiles] Functionality> Edit the functionality profile for the restaurant > Hospitality tab and mark field Is hospitality profile: Yes

If you have both normal retail stores and restaurants in your setup you will need to have separate functionality profile for these stores/terminals. You can select copy from while creating a new funcitonality profile to copy all the existing settings to the new profile and then just edit the hospitality setting.
-
-
Your POS Touch button layout needs to contain some hospitality specific operations such as Exit hospitality POS, Menu type selection and Split bill. Read about the hospitality POS operations here.
-
You need to make sure you have the Site Service running for the hospitality to work. But in a multi store environment you might want to consider having a separate local Site Service running for your restaurant. Read more about that setup here.
More configurations
Other things that you might want to configure:
| Inserted: | November 2020 |
| Version: | LS One 2020.1 |

