Changing the Receipt Panel
In the POS for the Demo Data the receipt panel looks like this:

This configuration of the receipt panel can be easily changed in the LS POS.
To add fields into the receipt panel:
- Locate the mouse somewhere in the title line of the receipt panel;
- Right click;
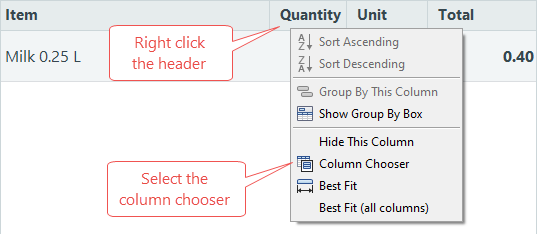
- Select Column Chooser.
- This window opens, it has all the available columns to add into the receipt panel:
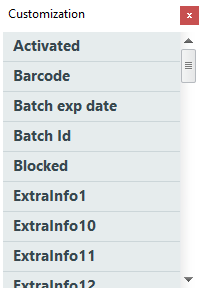

The header of the column is visible in this list. Some columns have the same title, for an example total including tax and total excluding tax both are called Total. Therefore you will see some columns multiple times in the list. Sales person is another example. One shows the ID of the sales person, one shows the full name and one the name on receipt setting from the user.
- Find the column you want to add and drag it to the title bar line;

- Here the field Item ID has been added:

- Continue to do this as many times as needed;
- Close the customization window.
To delete fields in the receipt panel
- Locate the mouse somewhere in the title line of the receipt panel;
- Right click;
- Select option Remove This Column or use the mouse to drag the field away.
System style
There are system styles that format the text in the onscreen receipt panel. These system styles are:
- POS receipt line sub
- POS receipt sale line
- POS receipt sale total - label and value - normal and negative
- POS totals balance - label and value - normal and negative
- POS totals - labels and values
The styles can be edited in the Site Manager.
Other design possibilities
In the virtual profile set on the terminal there are some settings for the onscreen receipt panel.
Go to Sites > [Profiles] Visual > Receipt settings tab
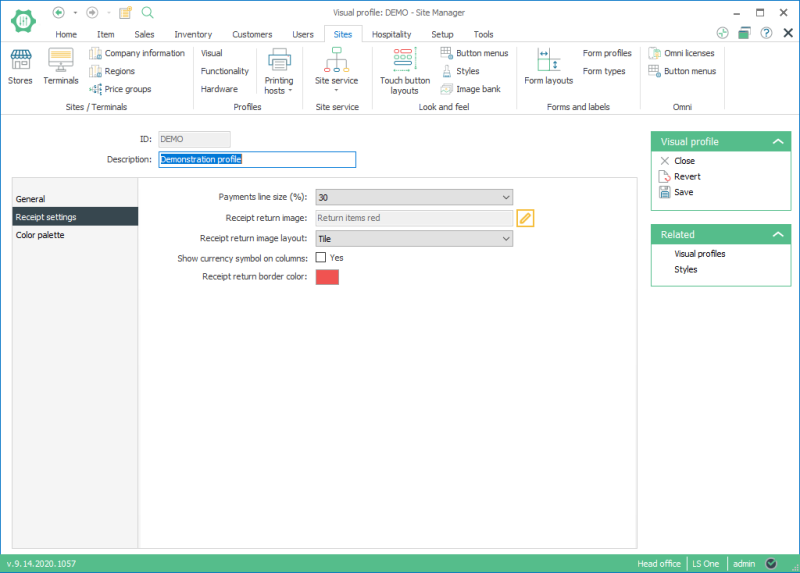
Read about the different settings in the field help: Visual Profile View
| Updated: | June 2020 |
| Version: | LS One 2020 |

