Food stamp payments
Follow the steps to setup a payment type for food stamps, EBT or WIC:
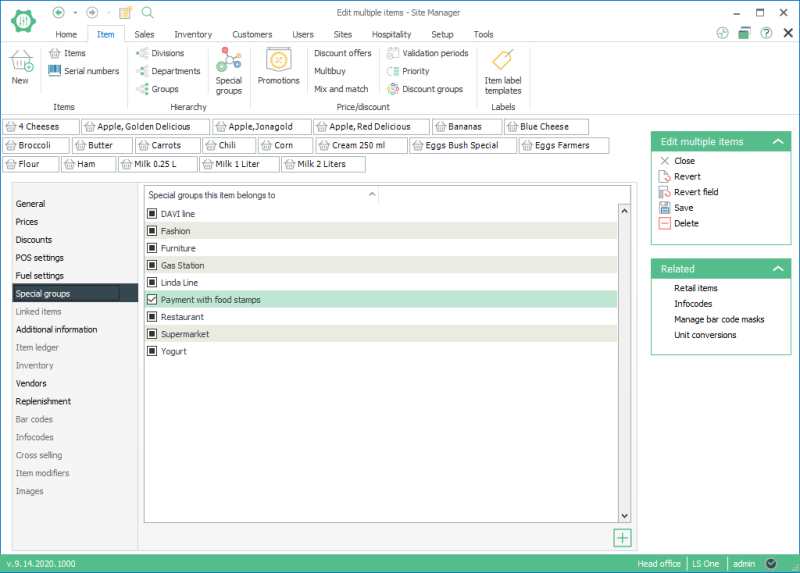
Add food stamp items to a special group
Below we describe how to restrict payment to either a special group or everything except a group of items.
First you can create a special group to be able to group together all items that you are allowed to pay for with your food stamps/EBT/WIC After you create a special group you can add several items to the special group at once:
- Open the item list
- Filter the item list to the items you want to add to the special group
- Select all items or a selection of items by holding Ctrl while selecting the items
- Right click and select Edit or press the edit button

- Go to the Special group tab and select the special group you made
Now you can edit the special group for all the selected items at once. You can even add a new special group from here if needed.
Once you have done this you can continue to create the payment type.
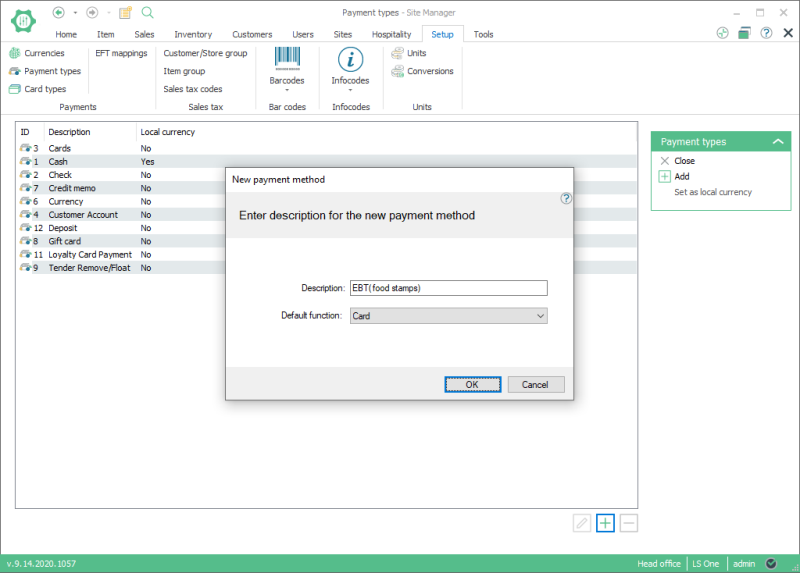
Create Food stamp payment type
You need to create a new payment type for the food stamps:
- In Site Manager go to Setup > Payments > Payment types
- Add a new payment type with Default function : Card.
-
Then add a limitation to the payment type you just added.

The Limitation code for Food stamps is usually provided by the authorities and must be the same code that the EFT terminal receives when customer food stamp card is swiped.
In this example the limitations code is EBT. The limitation code can be tax exempt so that no tax will be added to items paid for with this payment type.
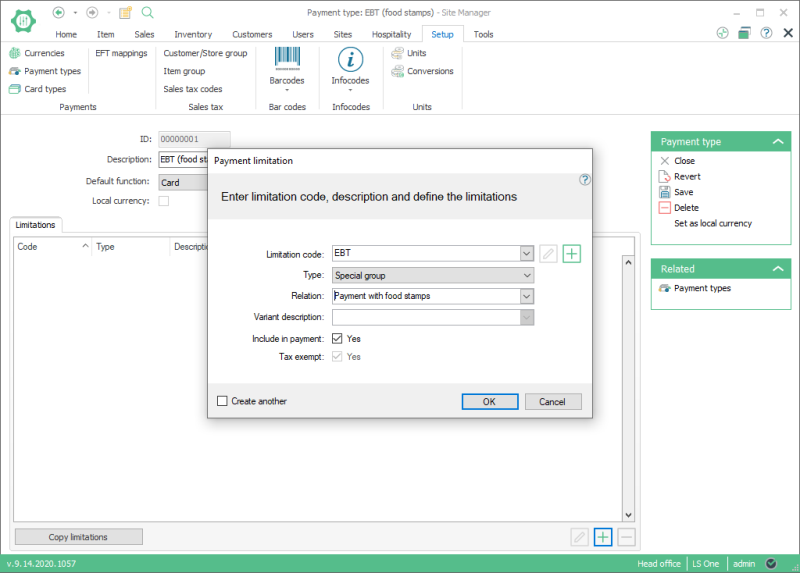
- Next you will need to add another limitation to exclude all other items from this payment type.
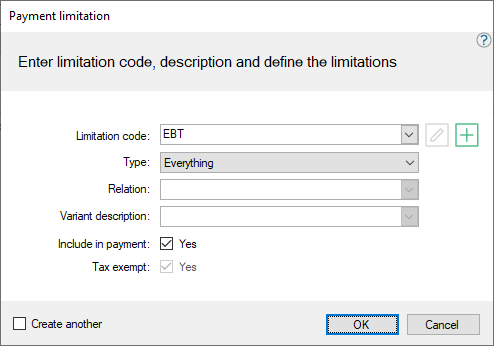
Here you could also setup two limitations so that everything is first included in the payment and then a special or retail group is excluded by deselecting the ‘Included in payment’ when creating the limitation. This would cause all items in that group to be excluded from payment with food stamp payment type but all other items are allowed.
When this is done you need to add the new payment type to ‘Allowed payment’ types on your store and select the limitation you want to use.
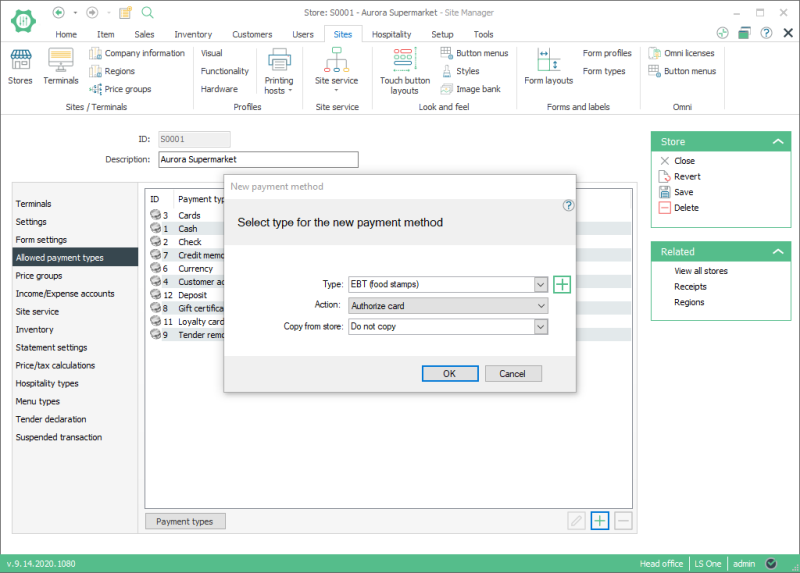
Add food stamp payment type to store
To allow the new food stamp payment type at a store do the following:
- In Site Manager go to Sites > [Sites/terminals] Store
- Select the store you want to add the payment type to and double click it from the list of stores.
- Select the Allowed payment types tab and press the add button
 to add a new allowed payment type to the store.
 - Select the new payment type you just created from the Type menu and then select Action: Authorize card and Press OK. You should now be ready to receive food stamp payments but you must make sure that the EFT integration you are using can handle these kinds of payments.
- When the payment type has been added you need to check the limitation code under Payment limitations tab on the Allowed payment type card.
You can also set the Force refund to this payment type so that you cannot purchase products and pay with EBT and then get cash back when returned.
-
Once this is done and the EFT implementation works correctly with the limitation code the POS will display a dialog when items are excluded from payment using this tender type.

