Email receipts settings
From version 2017 LS One can email receipts and other printable forms to the customer. To be able to email the receipts some settings need to be in place.
1. Hardware profile
Every terminal has a hardware profile and the hardware profile states where a receipt should be printed. If you want to email the receipt you need to configure a folder location where the receipts that will be emailed can be saved. The receipt will use the margins that are set in the hardware profile.
- In the ribbon select Sites > Profiles category: Hardware > Edit the hardware profile > Open the Printer tab
- Edit the Folder location field at the bottom of the form, you can for an example use the following folder C:\ProgramData\LS Retail\LS One POS\. Please note that the LS One POS as a program needs to have permission to read and write to the folder selected.
- Save the Hardware profile
Find additional information about hardware profiles and how to set them up here:
- Hardware Profiles
- Field help: Hardware Profile ID View
2. Site Service email connection
The site service profile defines how the LS One works with data that is kept centrally. The Site service also takes care of sending the email receipts which requires connection to the email server.
- In the ribbon go to Sites > Site service category: Site service > Site service profile >Edit the Site service profile > Open the Connection tab
- Press the Configuration ... button to configure the Site service configuration file.
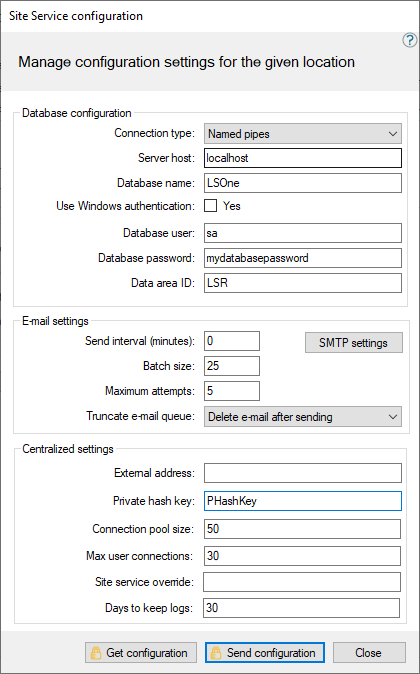
Send interval (minutes) - The emails are not sent directly but queued up for a period of time. This setting define how often the Site Service sends the receipts in the queue.

If this setting is set to 0 no emails will be sent.
Batch size - says how many emails are sent each time the Site service tries to send emails
Maximum attempts: says how many times the Site service tries to send an email before it discards it
- Open the SMTP settings button to configure the email server settings.
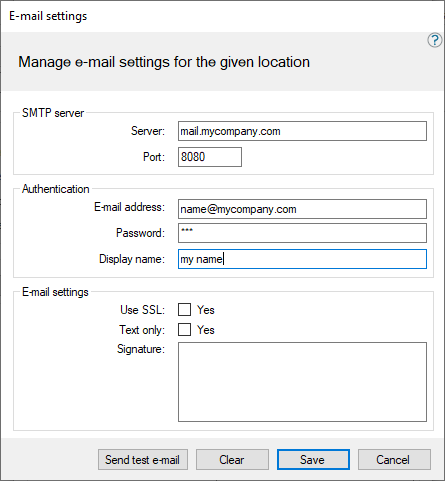
- Enter the server settings, email account name and password
- The display name is the "From" name that is added to the email being sent
- Press the Send test email button to be able to send a test email to check the settings.
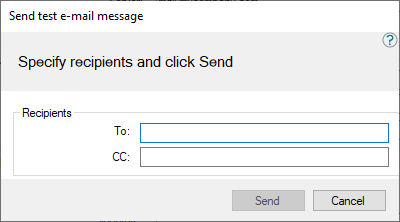
- Enter a email address to send the test email to and press send.
Find additional information about Site service profile and how to set them up here:
- Site Service Profile
- Field help:
3. Site service email settings
In the Site service view additional settings are needed.
- Open the Email receipt tab in the Site service profile.
- Activate the email sending by selecting the email receipts checkbox.
- Select one of the following options:
- Never: email receipts will never be sent.
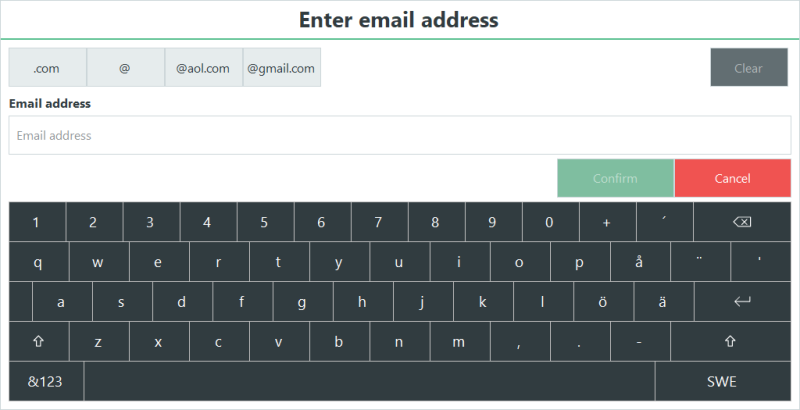
- Always: email receipts will be sent for every sale. The POS requests the user to enter an email address to send to.
- Only to customers: Emails will only be sent to registered customers that have been added to the transaction.
- On request:Emails are sent for the last transaction when a button has been pressed. A button with the operation: Send an email receipt needs to be added to the POS layout. This operation can define if the email is sent for the last transaction only or if you can search for a receipt.
- Email short hand options can be setup to speed up the email address insert. Buttons with common email address endings will be added to the input form in the POS. For an example: @, .com, @gmail.com and @aol.com
Find additional information about Site service profile and how to set them up here:
- Site Service Profile
- Field help: Site Service Profile View
4. Email text and subject
The subject and body of the email that will be sent with the receipt attached can be defined in a form.
- To create or edit the email text and subject, in the ribbon go to Sites > Form and labels: Form layouts.
- The email subject is of type: Receipt email subject. Create a new form of this type or edit an existing one.

This form can only have one line. if there is an enter (carriage return or line feed) in this text the email will not be sent.
- The email text is of type: Receipt email text. Create a new form of this type or edit an existing one.
This form can be as many lines as the user wishes and all variables except barcodes and logo can be used.
-
If these form do not exist in the Form profile (on the Store card) or they are empty then no message is displayed, and the default texts are used.

An example of these forms are included in the demo data package and the forms data package.
Find additional information about Form editing:
- Form Layouts
- Field help: List of all available variables.
5. Email attachment profile
The Email attachment profile tells the LS One POS which receipts should be sent as attachments. If the same profile is selected for both Form profile and Email attachment profile then all receipts including store's copy of credit card receipts and etc will be sent as attachments. To limit the receipts being sent to for example only the "Customers receipt" and perhaps the Gift card receipt then a new profile with only those two forms needs to be created and set as the Email attachment profile.
- To add the forms to a form profile, in the ribbon go to Sites > Forms and labels: Form profiles.
- Select an existing profile to add the emailing forms to or create a new profile
- Then add the receipts that should be sent as attachments to the profile.
- When the profile is ready select the profile on the Store. Go to: Sites > Stores > Open the store to edit > Open the Form settings tab
- In the Email attachment profile field select the form profile.
Find additional information about Form profiles:
| Inserted: | June 2020 |
| Version: | LS One 2020 |

